Quantcast
Channel: Spaceman Spiff's Blog Full O' Battlemechs...and more.
Viewing all 36 articles
Browse latest View live

Welcome To My First Blog Post!

$
0
0


Greetings to all and welcome to my "official" blog! Here is where i will try to give you a better glimpse into the world- or at least the top secret studio- of Spaceman Spiff. First, a little background....
    I started painting miniatures waaaaaay back. I think i was 11 or 12 when mom bought me my first box of lead Grenadier fighters and a set of paints after an incident at a D&D game at my local library. The DM showed up with a bunch of different miniatures and floor tiles! HOLY CRAP! I no longer had to just visualize the scene in my head, I could interact with those wonderful lead treasures! As I grew older, my collection of minis grew along with my skills. What truly pushed me was my local game shop would sell painted minis. I wanted to be one of the esteemed painters. After several rejected submissions, I finally made a hit once i learned how to do a wash.
    I was soon the in-house painting expert once i got a part time job there. I painted countless fantasy minis until one day i discovered the Ral Partha Battledroids and Grenadier Warbots. Then along comes this little game called Battletech....well, to make a super-long story short, I've been in love with all things sci-fi and battlemech related ever since.
     Some of you who visit my site will undoubtedly be familiar- dare I say fans- of my work from the Battletech forums where I started showing off my work. I thank you for stopping by! Some of you might be new to my madness. All i can say is that I hope you enjoy the show.
    Let's get on with the show, shall we?


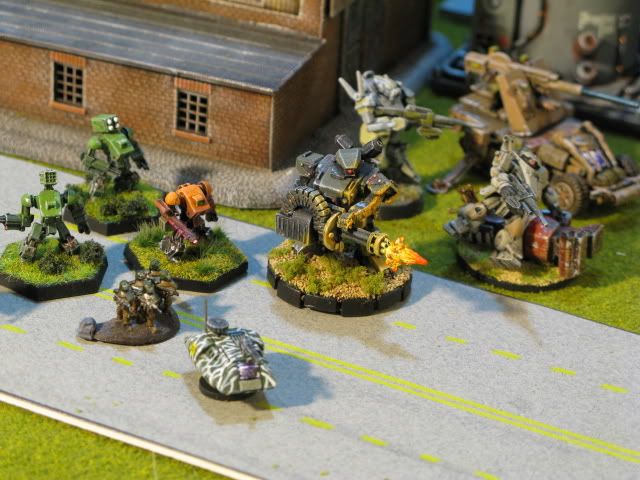
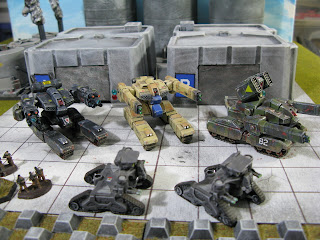
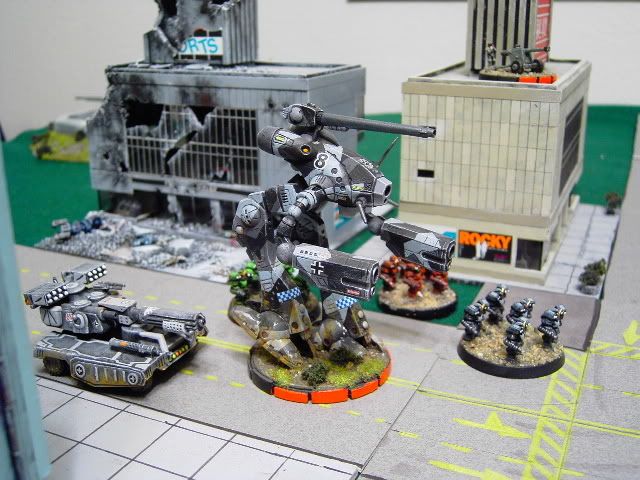
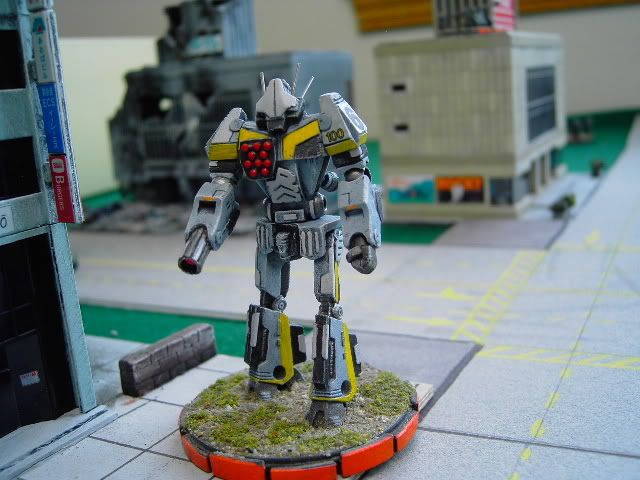
I tried to find a few older, acceptable pics. Here are a few really old works- 10 years or so ago....


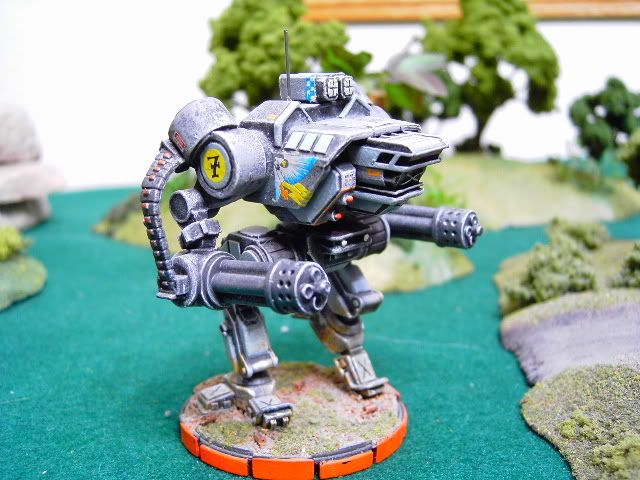
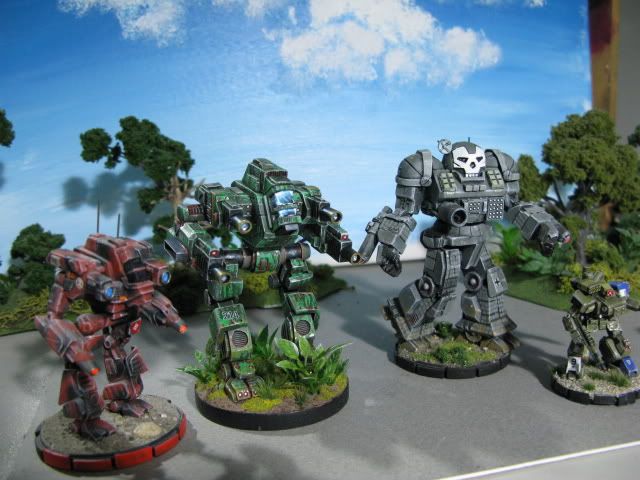
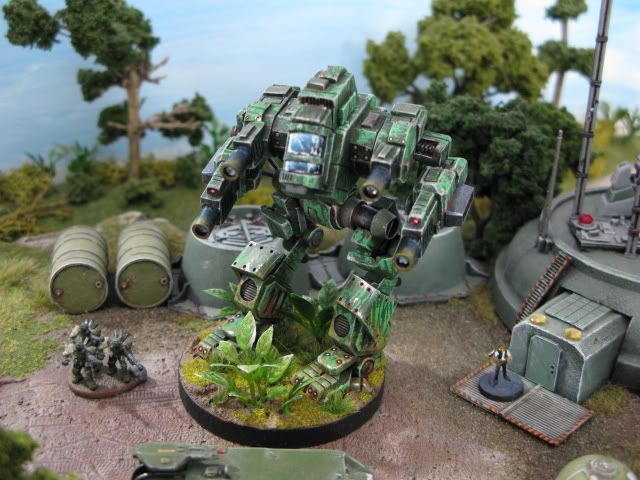
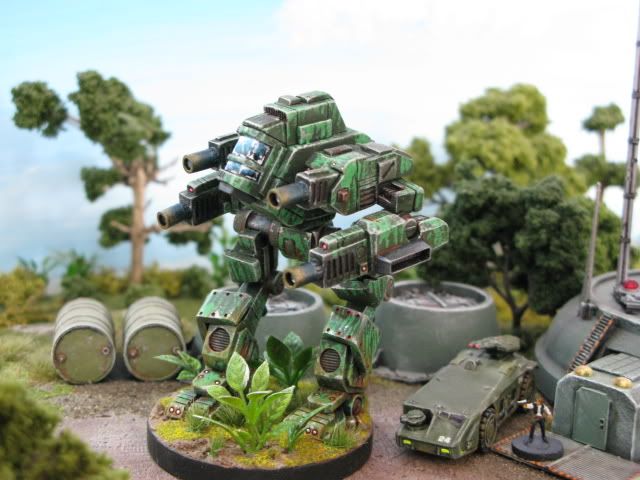
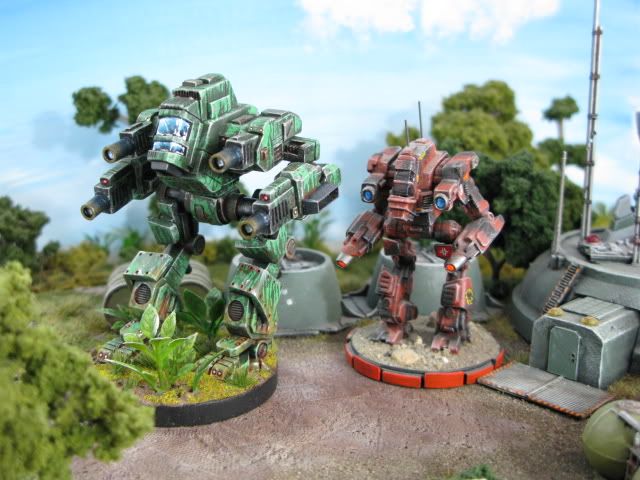
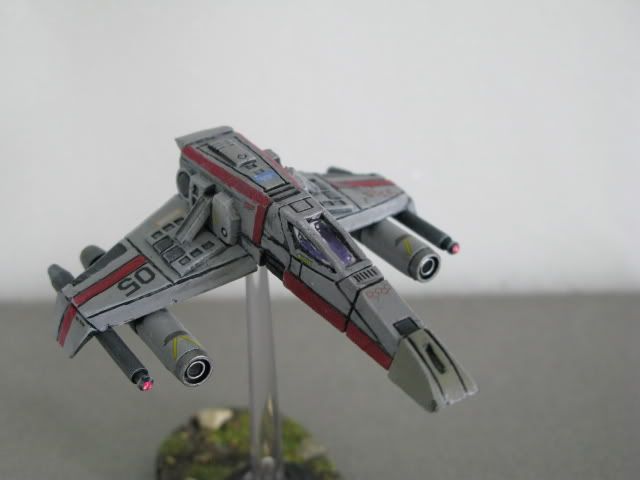
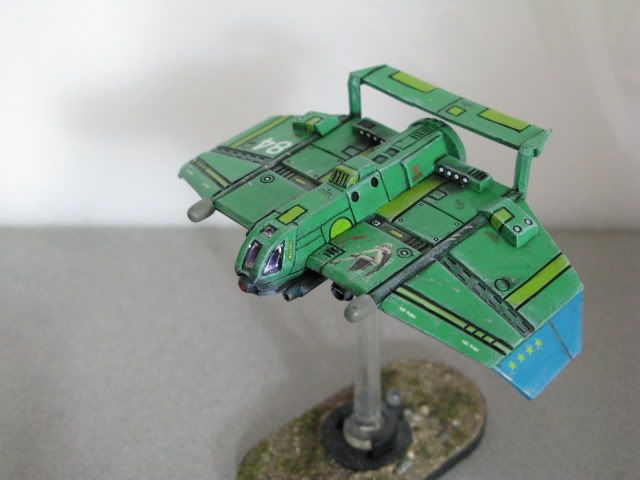
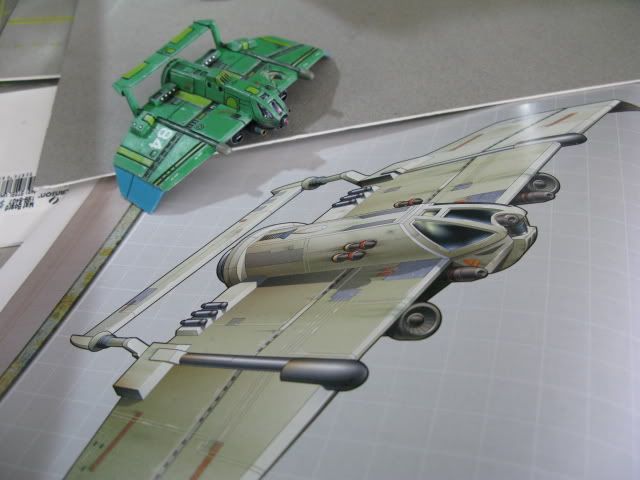
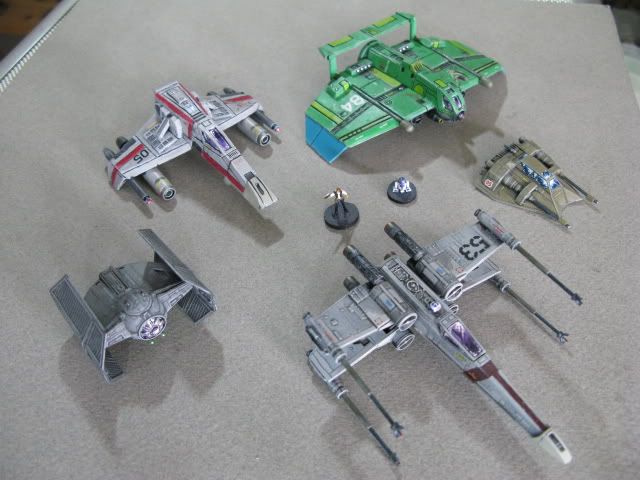
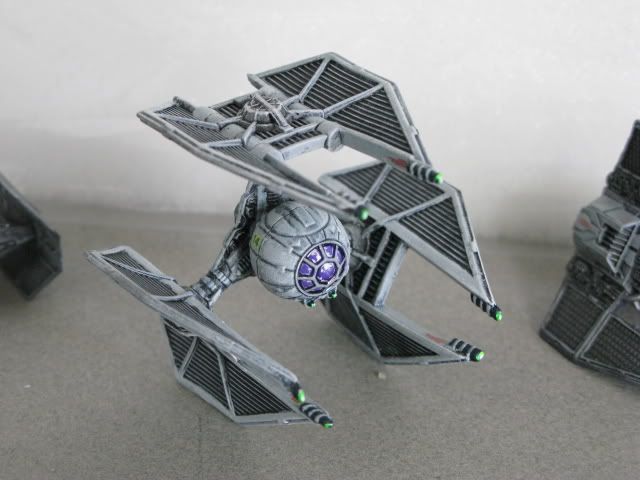
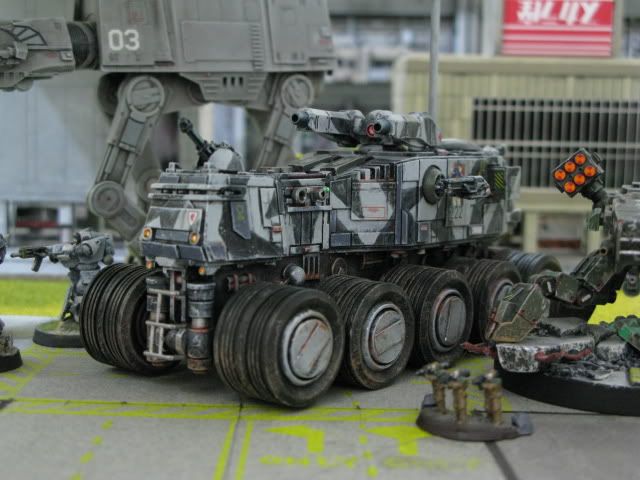
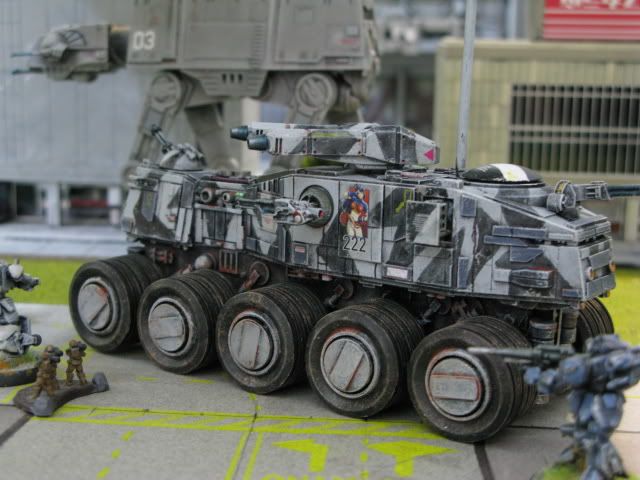
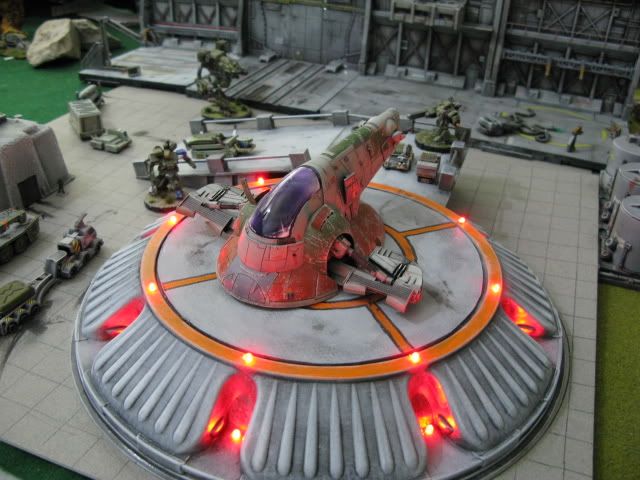
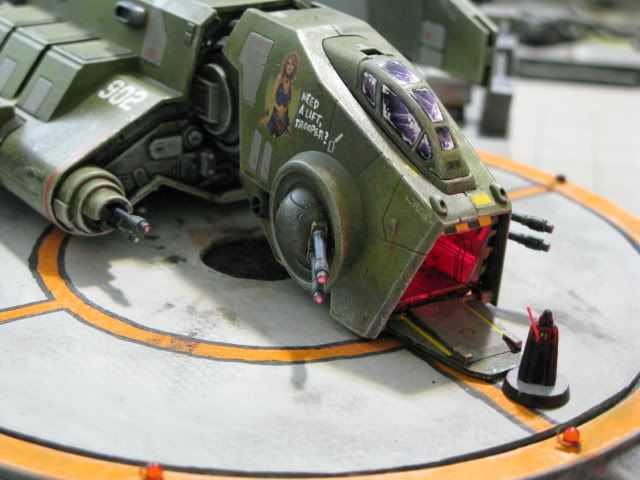
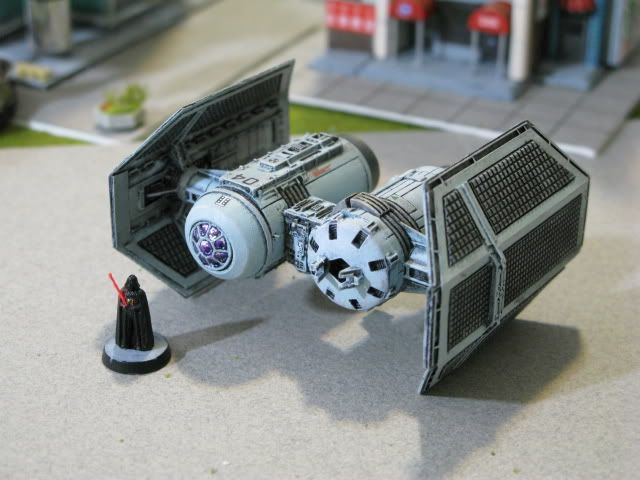
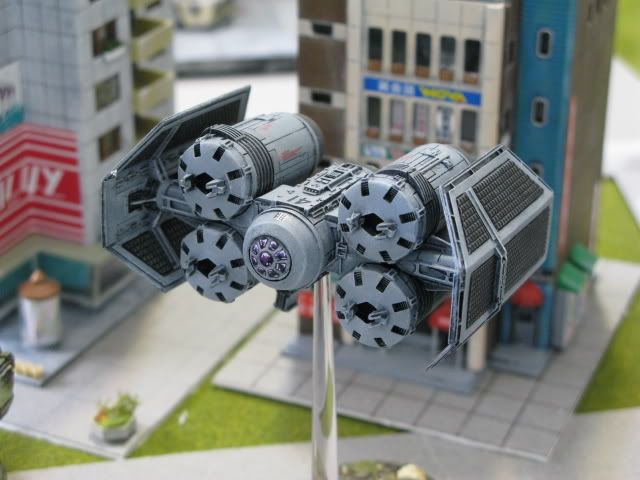
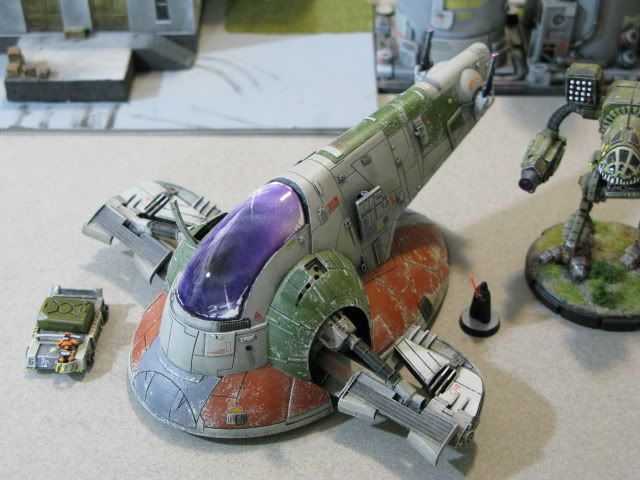
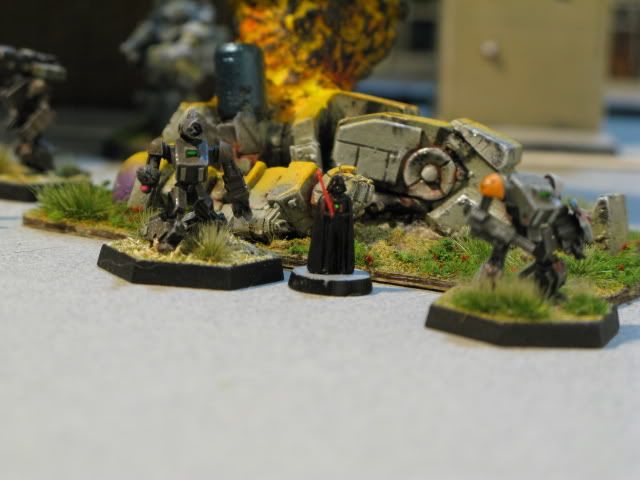
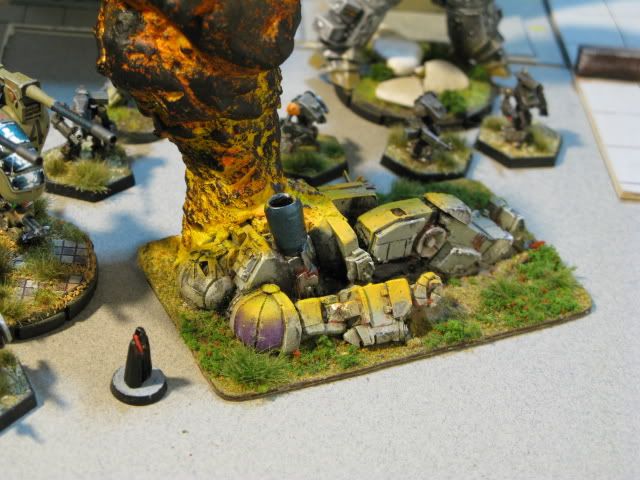
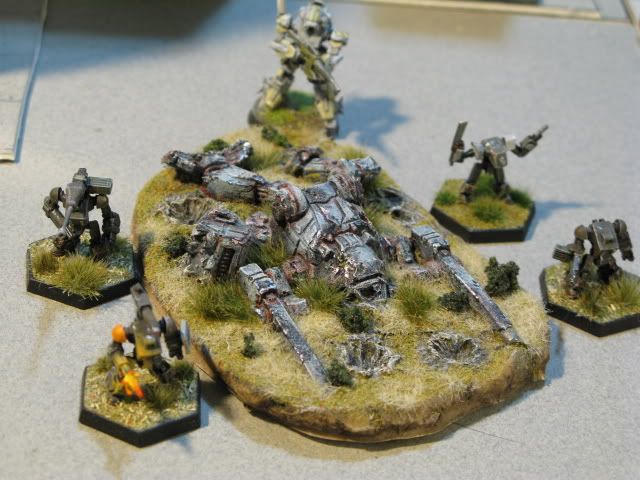
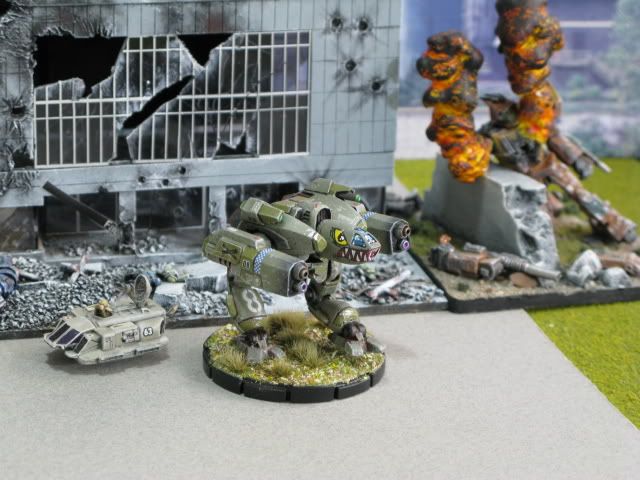
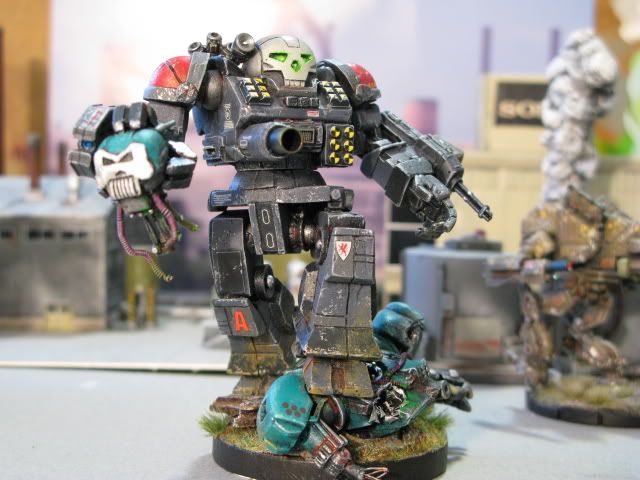
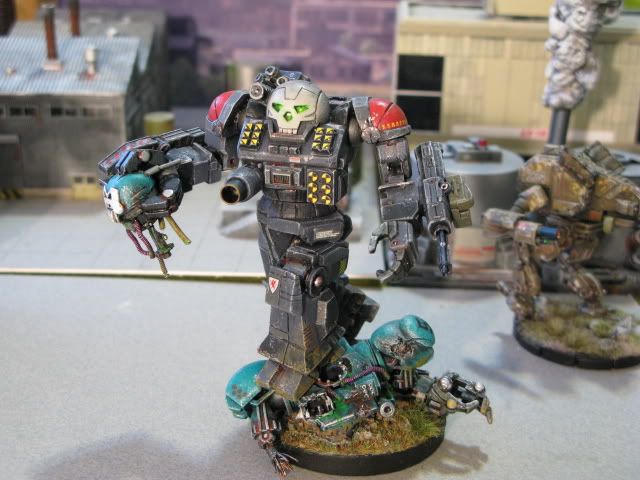
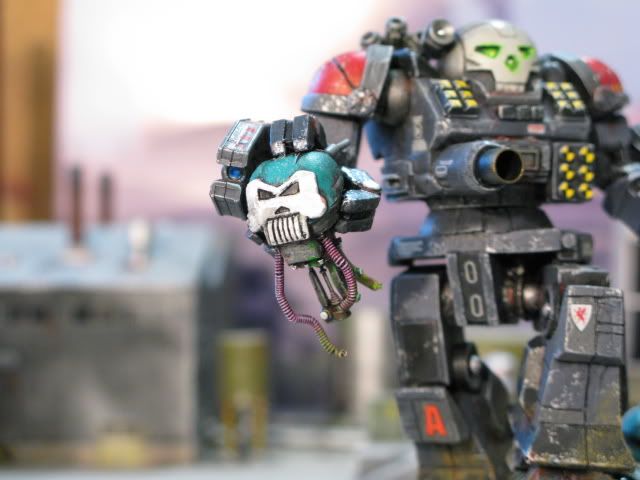
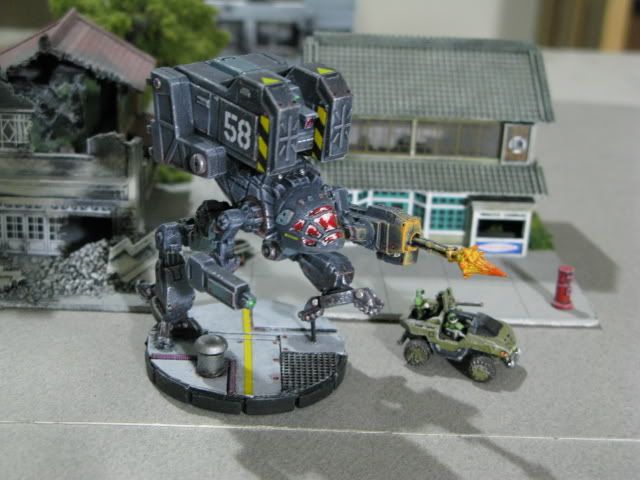
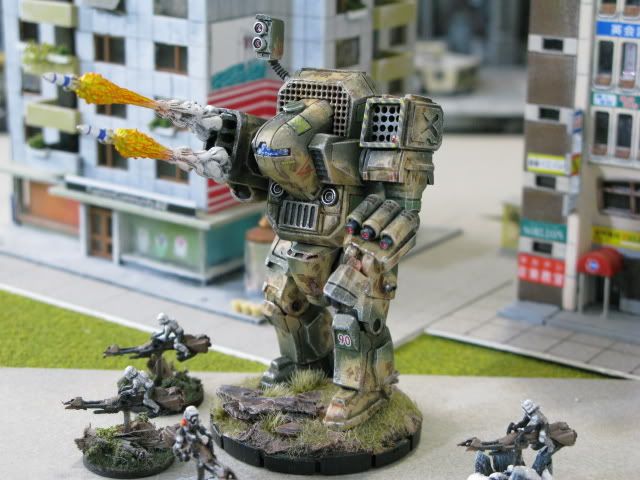
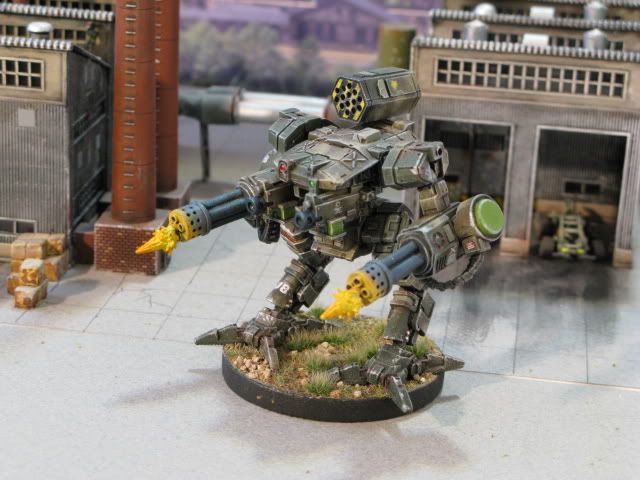
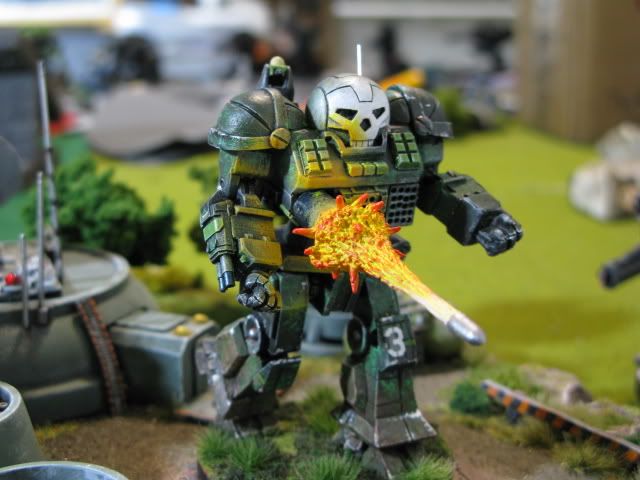
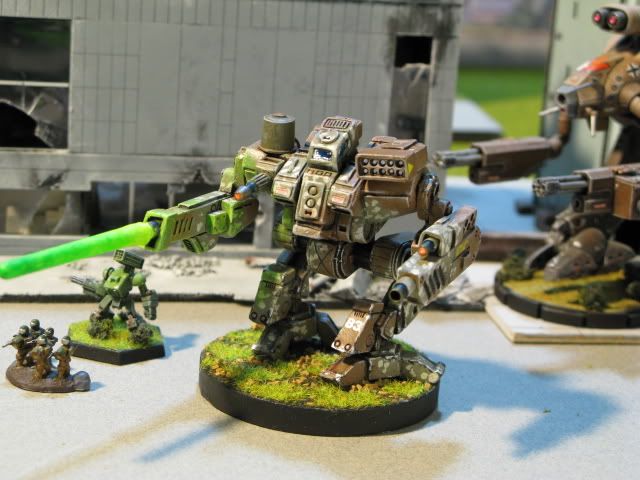
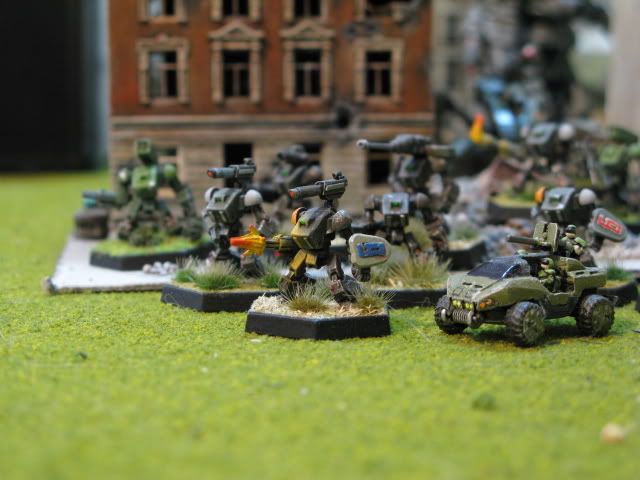
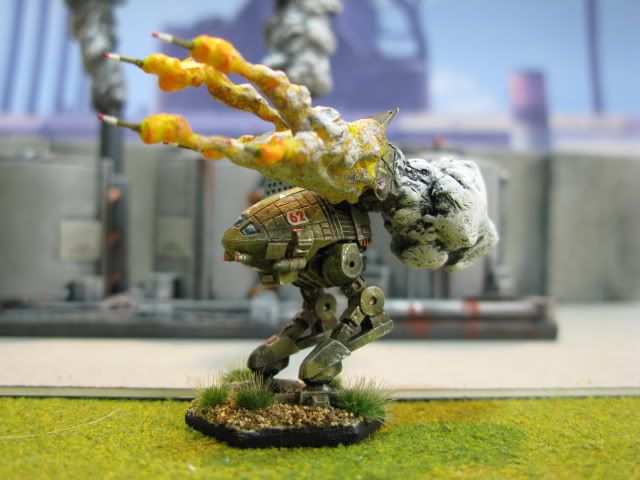
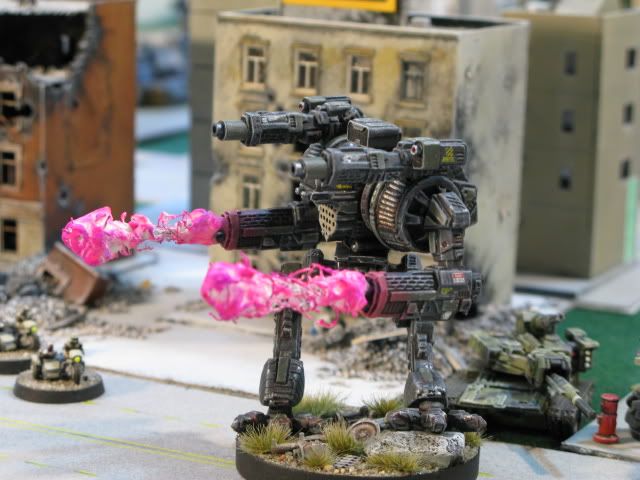
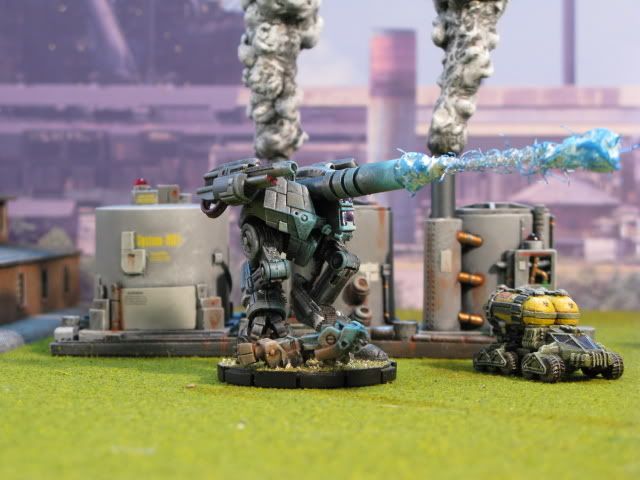
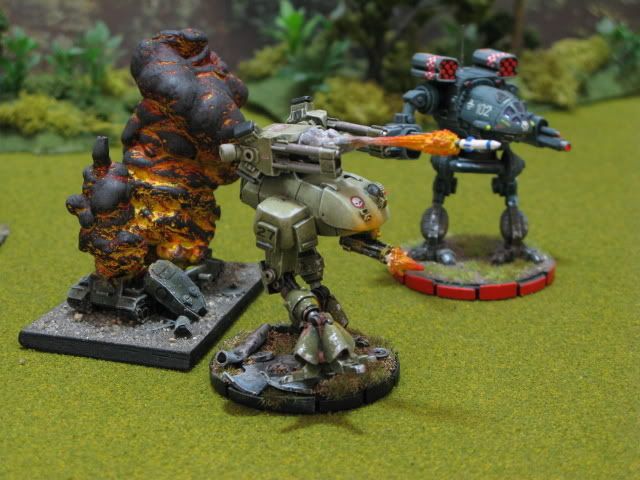
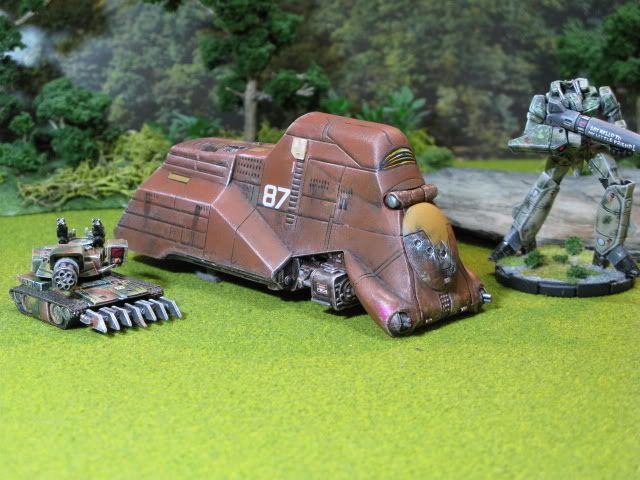
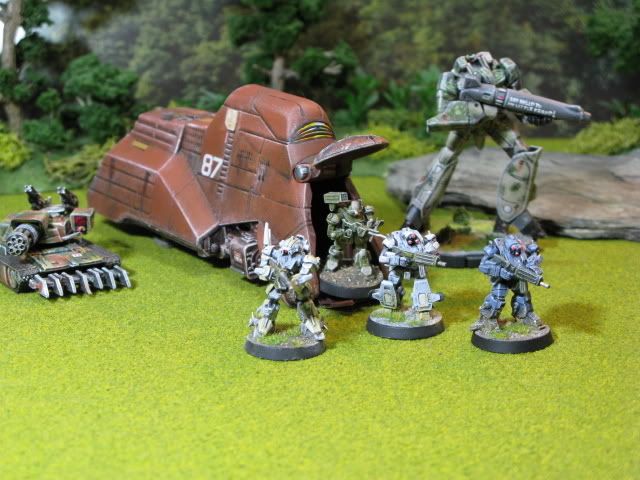
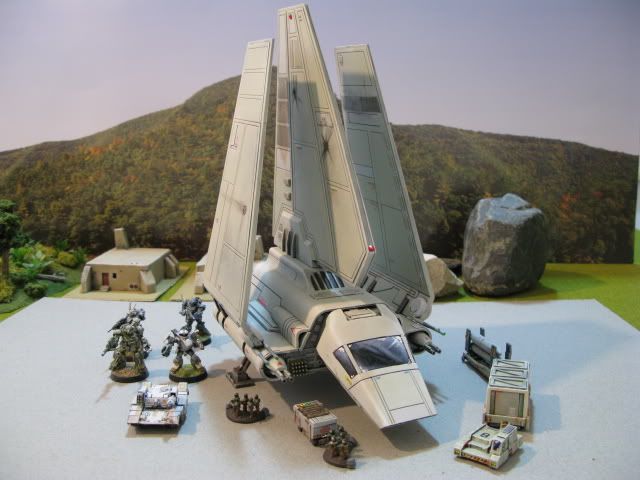
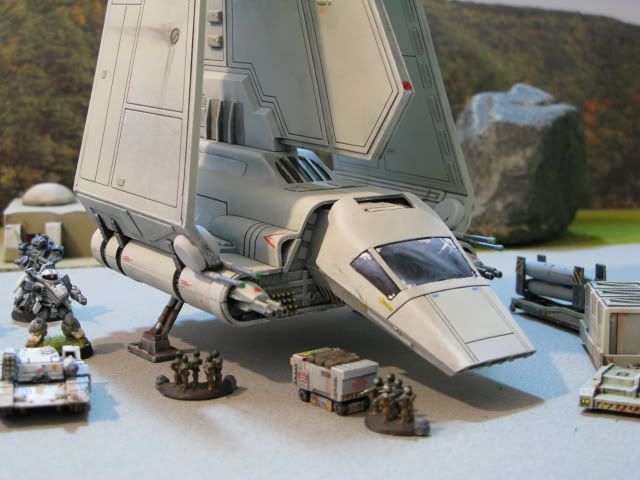
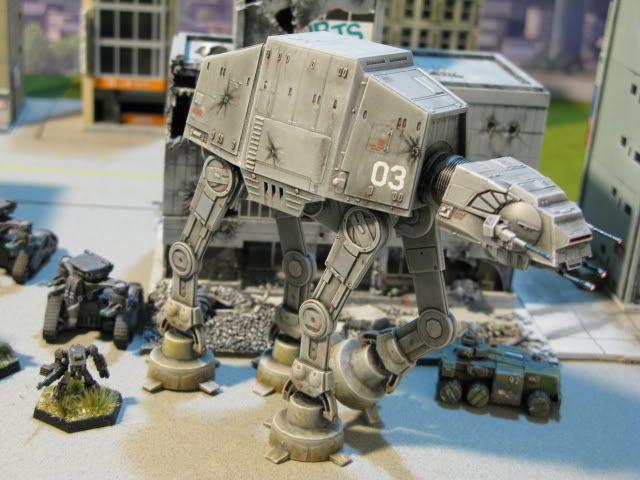
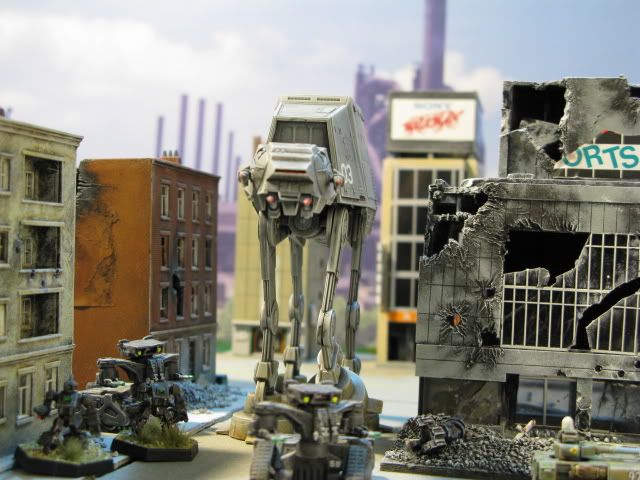
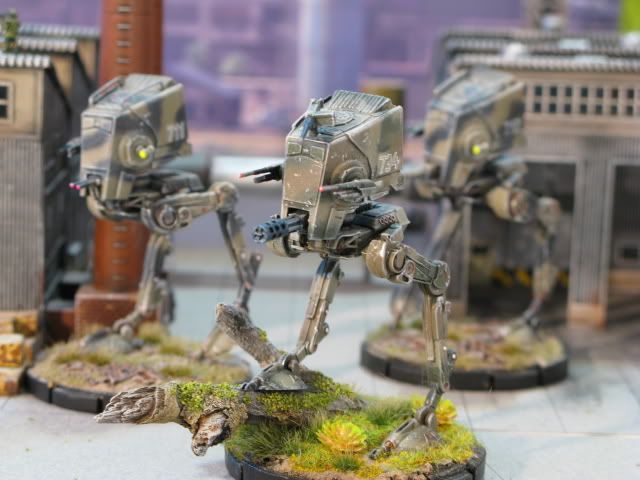
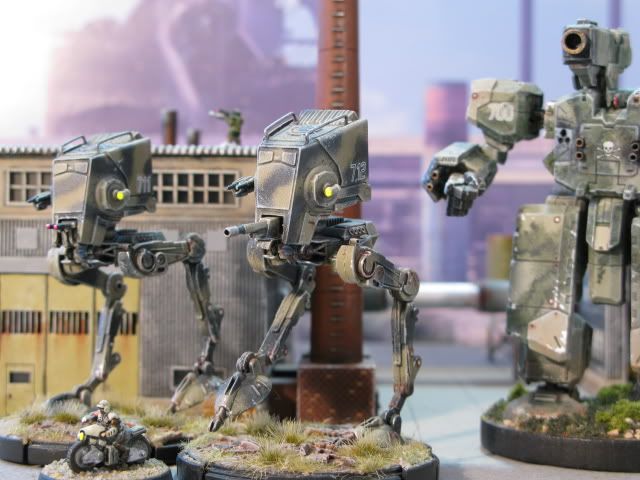
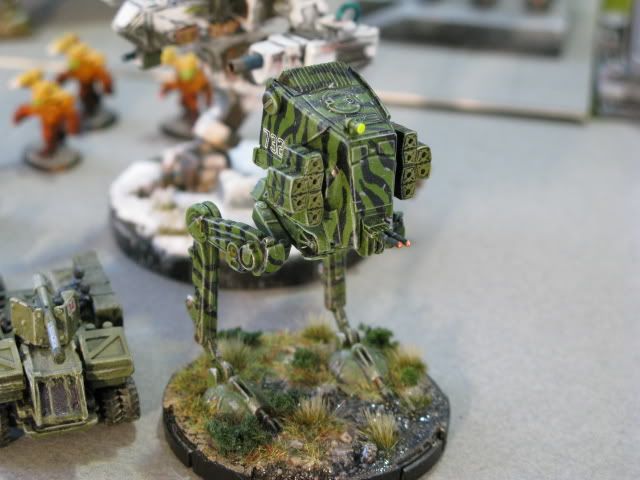
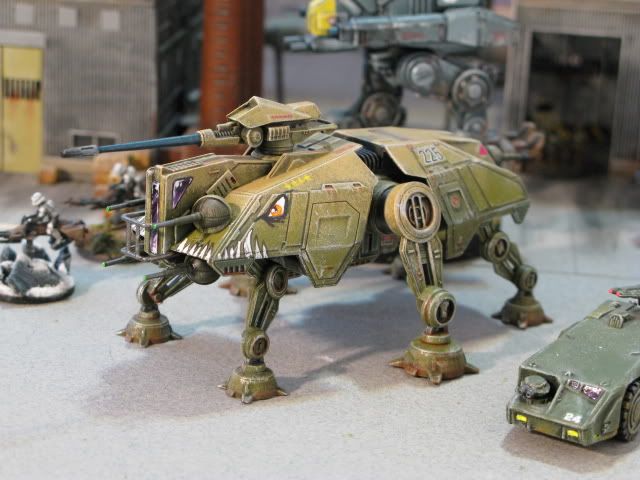
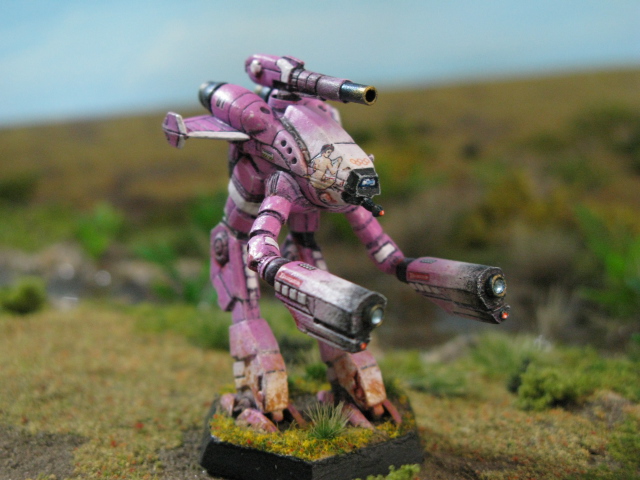
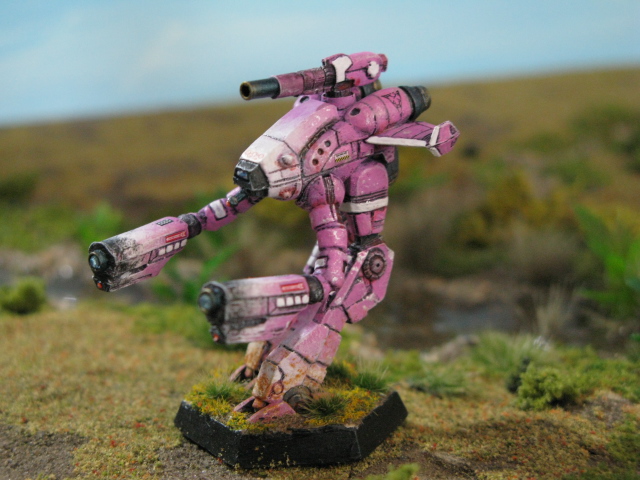
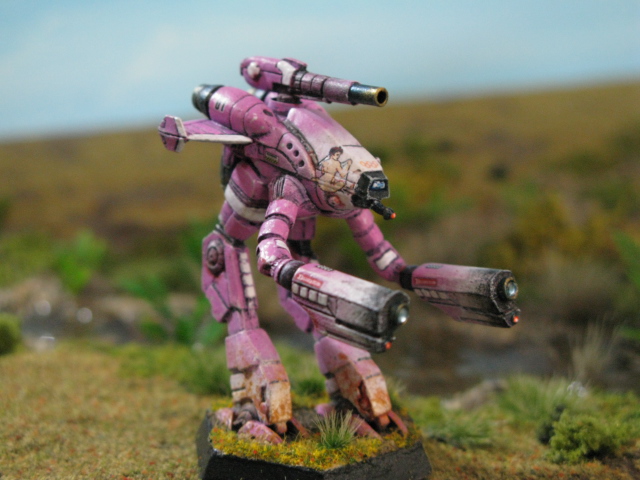
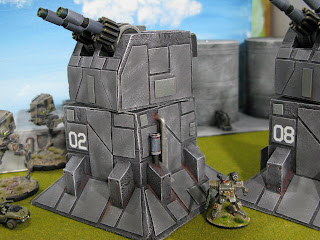
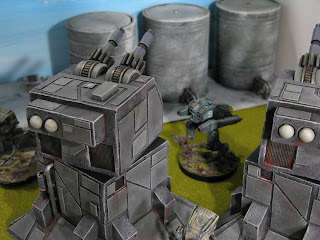
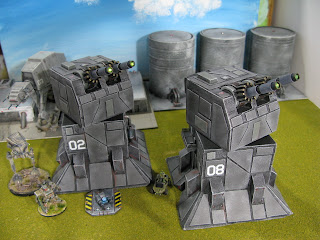
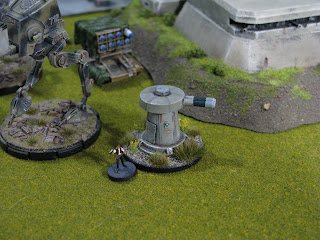
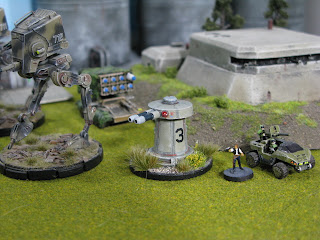
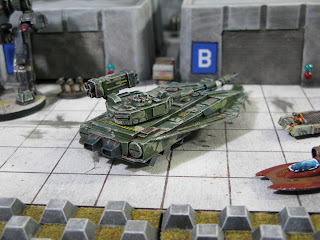
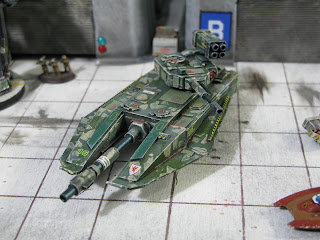
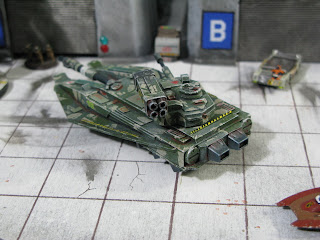
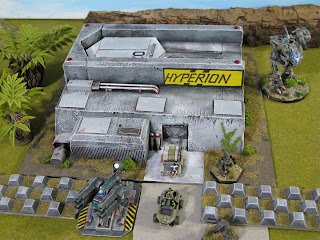
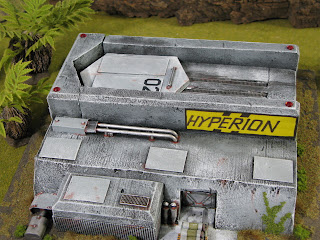
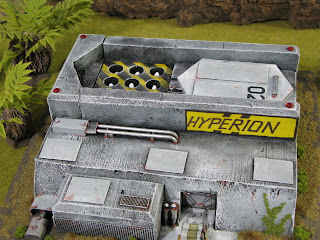
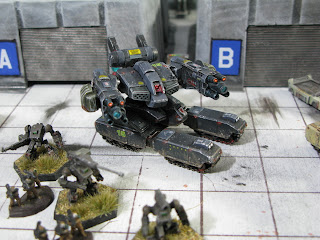
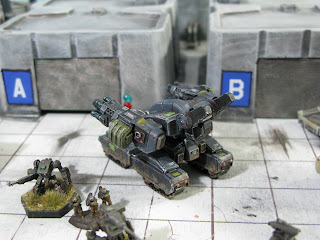
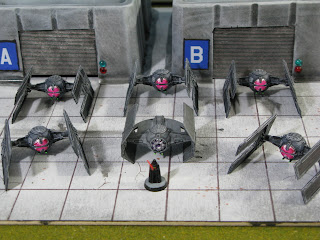
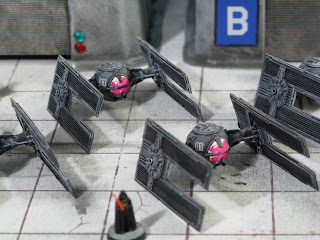
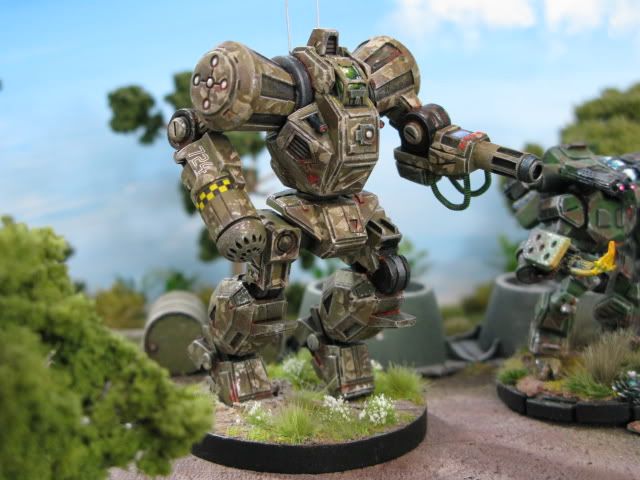
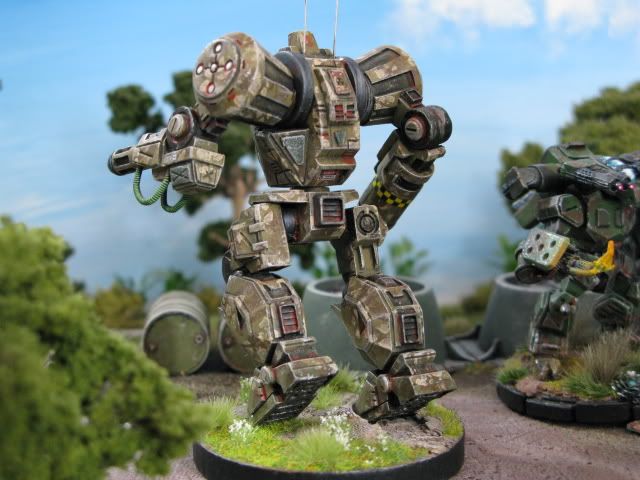
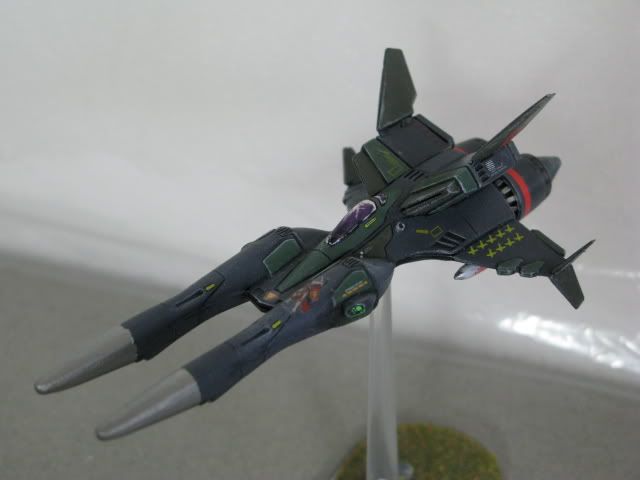
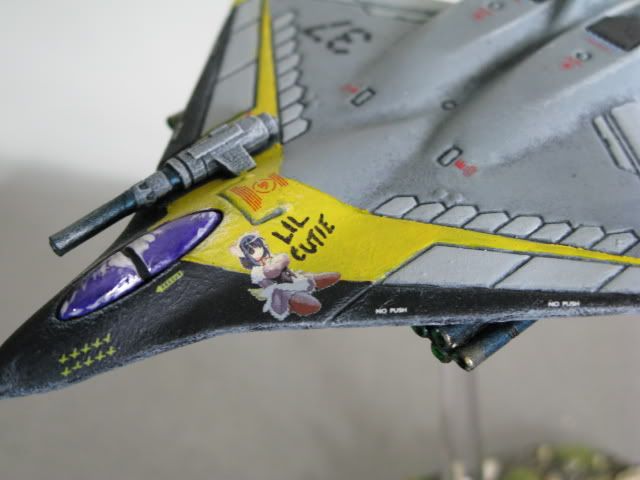
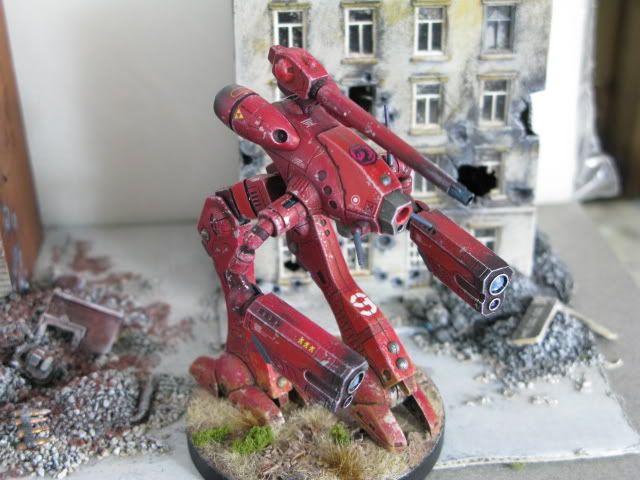
Now here are some of my most recent works- not even a year old....


Well, have I got your attention yet? In the future, I hope to actually post some WIPs, some tutorials, and even some videos of what is going on in my studio. I will try to get up as many of my pictures as i can, but bear with me...i have two Photobucket accounts with over 2000 pics total!

Spaceman Spiff


Old and Busted VS. the New Hotness!

$
0
0
I guess I forgot to mention that my work is almost exclusively in N scale. What is N scale? N scale is a model train scale that is officially listed as 1:160 ( 1 inch = 160 inches). However, I have found that any model between the scales of 1:200 up to 1:144 scale will pretty much fit right in. For all the hard core gamers, this translates to 10mm scale- this is the height of an average person at this scale.
   This is one of my upgrade minis that I sculpted myself. the original mech is called the hellstar- made by the now defunct Wiz Kids for their Mech Warrior clicky base game. This mech was supposed to be a 95 ton assault mech, but it was sadly under-scaled. I decided to correct this little problem by sculpting my own. my sculpting medium is a synthetic polymer clay called Super Sculpey Firm. It is a neutral grey color and is cured in the same toaster oven that I make Pizza Rolls in....not at the same time, mind you. I used another mini that i deemed to be the standard for which I will set my scale at- an Elfbait Atlas. The atlas mini is, in my opinion, the perfectly scaled 100 ton assault mech. Then I decided that not only will I correct the scale, but I will improve a few cosmetic details while I'm at it. Here are my results....


This is a pic of the old hell star, the new, improved hell star, and the atlas.


Here are some detail shots of my sculpt.


And another shot of the new versus the old....


Star Wars Changed My Life!

$
0
0
Oh, I remember that day like it was yesterday....standing in line at the River Hills theater back in 1977. Waiting to see a movie that would forever alter my very soul. OK, so I traveled down the path to geekdom. Big Deal! I embrace my geekiness and now I share it with everyone! Here is the pinnacle of my geek-hood.... Star Wars miniatures painted- and in a few cases, sculpted- by me.

I sculpted the E-wing, since there is none in my favorite scale. I changed a few minor details here and there, but still retained the over-all look.


I also sculpted the cloakshape fighter.


Here are my sculptures next to official minis. I think I did quite well getting the scale correct.


Que up the Imperial March.....


Alright, this should be enough Star Wars for now. There are many more to come....

I See Dead Mechs....

$
0
0
I just know you whispered the title of this post to yourself. As the title suggests, here are some casualties of war. In case you asked yourself who would win in a fight: a 100 ton assault mech or Darth Vader...wonder no more!
     A point of interest: the hoses trailing from the mech head in the last few pics are guitar strings. You may also be wondering how the hell did I make the burning hulks? That happens to be spray foam that I had to build up around nails that I drilled into the models prior to painting. The foam is a serious pain in the ass to work with. I had to build up a little at a time, wait 24+ hours for it to dry, build up a little more, wait again, repeat if necessary. Occasionally, I would use my Exacto knife to help shape it a bit while it was still wet. When this shit finally dried, I came to realize that i would also have to add a protective layer of watered-down scenic glue. Otherwise, the acrylic paint would often tear holes in the foam because of my painting technique. I would apply my layers of color before they would dry so as to blend the colors nicely together. Unfortunately I discovered that the drying paint was sticky enough that it would stick to my brush as i applied the next layers of color. This would create a big, white hole in my freshly painted foam! By trial and error I perfected my technique...but it is still a pain in the ass.
    I have also since repainted the ejecting pilot mech. I used florescent yellow paint to try to get the flames to really glow. Well, the yellow kinda took on a greenish hue which is faintly detectable in these pics. Trust me, it was worse in person. So I sat down and redid the flames, this time not going with the flashy neon yellow paint. I think the newly repainted work is in the background of some of my other pics. You'll just have to watch for it.


Studio Time!

$
0
0
Alright, fans, here is my first sneak peek at what is currently on my desk in various stages of completion. Some are nearly complete- just missing that final shot of matte sealant. Others are still being assembled. I will take better photos once everything is done, not to worry! I am also experimenting with a small landscape strictly for picture taking. The fun part here is that I am also experimenting with water effects. Man, the stuff takes long enough to dry! And Owen, if you are reading this, there is another teaser of the monster tank for you. I have also included a picture of my studio "assistant". it's a wonder I get anything done! Some of you may be shocked to see a few small-scale mechs in there. Those are being done for the winners of a charity auction on the Lords Of The Battlefield forum. Yes, the marauder is pink. That was what I was assigned to do. As soon as the scenery is done, I will take some pictures of whatever else I have finished on my brand new landscape.


Oops! Sorry, Owen. I almost forgot this one....Can you see the vent covers I added? And the shovel? And the muzzle brake?


Fire For Effects!

$
0
0
As I was browsing through all the wonders of the vendor booths at Gen Con '08- my first Gen Con- I wandered into the Armorcast yard and found some things that instantly sparked a brush fire of imagination. Here were these fire effects: missiles with exhaust trails, explosive cannon rounds, laser blooms, oh my! I greedily grabbed an assortment of effects that I HAD to have, and for a few seconds actually wished I was back home at my studio desk....That soon passed when I discovered the Dream Pod 9 booth, and so on, and so on. Once I did get back home, I immediately began using the wonderful bits that i bought. Then I began to have other visions of even grander special effects. I shall call this the George Lucas Syndrome- only without the shitty child actors, story-killing editing, and "WTF" CGI characters! Here are some pictures of my special effects:


This laser bolt was created with the broken end of a plastic paint brush handle. i just melted the one end and shaped it to fit the gun barrel.


Ok, he's not exactly firing, but his flame thrower is ready to light up a few cigars! I sculpted the flame out of 2-part epoxy.

This is actually a classic Battletech scaled mini ( 1:300 ). The missiles were made out of 1:35 scale bayonets. The missiles were then attached to wires which in turn were anchored into the launcher. Carefully using a can of spray foam, I applied the exhaust plume and missile trails.

This is meant to look like a particle projection or plasma blast. I got this idea from the X-Box Mech Assault game. However, I wanted to change up the color a bit. I used two short strands of anti-static wire and carefully built up some spray foam on the strands.


This was my first experiment with the anti-static wire and spray foam. I think this might also have been my first attempt at painting light source effects.

This is what happens when you decide to clear out the building with four heavy flamethrowers! the huge fire ball is not fixed to the mech. I made it as a kind of blast template by fixing a big wad of spray foam to a wooden base with a nail stuck in it for the flame stream. The range may be a bit too short, but it sure looks wicked cool!


Well, I hope nobody tried to look at this thread with a dial-up connection! I didn't realize just how many fire effects i had.


Still More Star Wars Meets Battletech....

$
0
0
I LOVE STAR WARS!!! You know this by now. I am a fanboy and I am unashamed. Here are a few more Star Wars minis for your viewing pleasure:

I think this was a Star Wars Action Fleet toy. It looked like it was properly scaled, so I bought it. Um...Yeah, it no longer carries droids.

This was also an Action Fleet toy. And, yeah, it no longer carries droids...or jawas for that matter. The crawler's name is Shamblin' Bob. 

I believe this was made by Ertl Models. It did not have any scale listed, but I think it is pretty darn close. the wings are fully articulate, as well. I added some missile pods to the front hull.
This is the business end, you rebel scum!
This version of the AT-ST was commissioned by the Empire shortly after the battle of Endor. It is equipped with all sorts of anti-cute 'n' fuzzy weapons.

Another modified AT-ST. I gave this one A larger chin cannon. His un-modified platoon mate is behind him. Actually, I shouldn't say "un-modified". I added the guard rails on top of the hulls.  


This one is loaded with napalm rockets. Again, another precaution against all things cute and fuzzy.


With the exception of the first three, all of these are official 1:144 scale minis made by F-Toys of Japan. I just added my own special touch....


Real Men Paint It Pink....

$
0
0
This is a commission for a charity auction winner that I just recently finished. He has a custom mech company called the Barbie Brigade. Their unit colors are...well...a bit unusual for a war machine, but who am I to turn down such a challenge? He gave me the general color scheme- pink with white trim- and I went from there. This mini is a classic 1:300 scale marauder II approx 2in. or 4.5cm tall. He also supplied me with a pin up girl decal and the unit decal. I altered a few details that I didn't like about the original mini. I enlarged the PPC barrels on the arm pods to look like proper heavy weapons. Then I enhanced the hull cannon by replacing the barrel with something more suitable. I also beefed up the turret attachment for the hull cannon. Then finally I replaced the old exhaust vents with my new, improved versions. The old ones looked like flower petals.


New barrels on all the big guns! Scandalous art work on the nose, ohh-la-la!


New vents!

Those are tiny, blue, reflective jewels in the gun barrels on the arm pods.


The Cherry Blossom Tank.

$
0
0
My friend, Owen, is starting a 15mm army. He wants his army to have a Japanese-inspired color scheme. He sent me a package full of miniature goodies. In the box was a note saying I can keep everything in the box on one condition: I must paint the tank for him...The note was written on a printout of some pictures of a color scheme he had in mind. With the pictures close by on my desk, I accepted the challenge! What you see here are the results of that challenge: paint a cherry blossom tree on the tank!
    The tank is made by Khurasan Miniatures. It is a 15mm red faction tank with the red eagle turret option. I'm gonna have to get a couple of these for myself now. I added a few extra details: the muzzle brake, the crew shovel on the hull, and the screen covers on the turret.


I threw in a few of my own 10mm minis to give you a sense of scale. This tank would make an excellent Battletech super-heavy...with a few more guns!


My Ultimate Mech Bay.

$
0
0
Here is one of my little pet projects that has been on and off my priority list for quite a while. This is the closest to finished it has been so far. I threw in a bunch of eye candy as well. These are four separate mech bays made by Kotobukiya of Japan. I am currently in the process of permanently mounting the four bays onto a plank of wood so that I could move it from place to place a whole lot easier. Why, you might ask, do I need to move them all together? Just wait until you get to the bottom of the page.....

The loading claw in the foreground is fully articulate and it comes with an interchangeable engineer platform.


Here you can see a custom control booth that I scratch-built to monitor the flow of traffic in my mech bay. I also added some guard rails to the walkway on the right, but I see I have forgotten guard rails on the platform where Han Solo is standing dangerously close to the edge. Oops. I hope there are no surprise OSHA inspections...

The coolant turret with the hoses is also a custom-built piece of my mech bay. The hoses are made from two part epoxy. I think the turret itself might have been part of a Transformer toy.


Ok, now you have a pretty good idea of how busy my mech bay is. Now you are probably asking "Why is this the ultimate mech bay?" Well, here comes the shock and awe portion of my post....


To give my control booth a bit of life, I painted some crew silhouettes inside.


Now you know why the bay door is so big.


I still have to work on toning down the LEDs just a little bit, and the white ones look a bit like the blue ones in some pics, but good grief, it was a lot of work to install them. I believe this little project has been well worth the trouble so far.

Half Track...All Business.

$
0
0

This is the anti-mech half track. This began life as a MW JES missile carrier. I tore of the missile racks and sculpted a flat bed where the gun would be housed. The gun itself is readily recognizable- a German 88 from the Flames Of War collection. I added the gun crew from miscellaneous MW infantry pieces and added a more sophisticated targeting array to the front of the gun shield. I replaced the front wheels with the wheels from the 88's gun carriage because they looked a bit more rugged. I sculpted the side stabilizer housings and then used a pair of braces from the 88. Finally, I added some stowage and a front winch that I picked out of my spare parts bin.


Here is an action shot of a troop transport and an artillery half track setting up shop along the shore of a shallow stream.

Once again, a JES missile carrier gave its life to become one of my most devious war machines: a mine layer! I sculpted the entire cargo body and just stuck it on the back of the now-bare chassis. Of course I then had to make a minefield for my busy little layer. If you look closely, you can see a few of the anti-mech mines in the freshly sowed field.


You can see part of another of my older half tracks guarding the busy little layer.

This track used to be a MW recovery vehicle. Once I removed the repair arms, I thought the empty bed looked like benches. Naturally, I inserted some seated infantry then added a small support cannon.


Same chassis as above, different purpose. This one is part of the artillery section. I sculpted a small housing to attach the actuators to. The actuators are ankle joints from a Gundam model, I think. The missile pod came from a 1:100 scale Macross tomahawk ( a warhammer to us Battletechies ). I sculpted a small body for the targeting array and sculpted some small cargo boxes for the stowage racks. Finally, I added an MG42 ( another FOW piece ) and a hatch to the top of the crew cabin.


Here is a family shot. Anybody notice the super-secret easter egg in the picture?

Here are some of my ECM/ recon elements. The little hover tank began life as a Star Wars battle droid backpack. The wheeled truck was an APC until i added the electronic gear to the hull. The massive half track is basically a MW mobile HQ. I upgraded the satellite dish, added the comm pod to the side, and the ECM dome to the rear of the hull.


CMG War Walkers...With A Twist!

$
0
0
I got a set of these war walkers from Critical Mass Games ( http://www.criticalmassgames.com )a while back. Then I became bogged down with a wave of commission projects that put these guys on the back burner for a while. Well, I finally got them finished and put in front of the camera! I must say these are fantastic minis: awesome details and casting quality. They were a joy to work with! They are made for 15mm, but I am using them for 10mm- they make nice heavy mechs around the 60-70ton range. Of course, I had to alter the basic minis just a little bit....


This is the basic war walker that I started with. The pic is from the CMG website.

This is my assault version.

I added numerous heavy weapons- the arms, shoulders, and nose cannon are all bits from my spare parts box. I also added some little details like the "nostrils".

I also added an extra set of heat sinks to the left and right torso just beneath the overhang.

Heck, even the gun barrels are modifications of my modifications. I extended the arm guns using metal tubing bits and extended the nose cannon with a bit of plastic tubing and the muzzle brake from a 1:72 German STUG.

This is my anti-air variant. Those miniguns came with the mini. I added the radar dish, the nose cannon, and the missile pods.

The missile pods are made from the forearms of an old Front Mission mech with the missiles sculpted by me and exhaust vents on the rear.

The base is custom made by me out of Super Sculpey. The stones are cut from blue insulation styrofoam.


Here is my recon version. Note the target acquisition scope and the up-link array on the rear hull.

Now for the cool part.....

The arms deploy!

In case you are wondering...the arms came from a Gundam model.

Great for manipulating small objects like crunchies!

Arms have been stowed. The crunchies are safe.


Alright folks, hope you enjoy this little presentation as much as I enjoyed giving life to these minis!

The River Is MINE!

$
0
0
Here is a little something i whipped up years ago that I just recently refurbished. I was a huge fan of a little computer game called Total Annihilation. I was inspired by the naval vessels in that game and just had to try to make a table-top version. I began picking out parts from my bits box and then went about fabricating a hull to accommodate the parts. The hull itself is made out of blue insulation styrofoam. I then glued all my bits in what i felt were appropriate places. All the turrets are traversable! The base is created with wood putty. After slapping on the filler putty like a layer of delicious peanut butter, I just pushed the ship into it to make the wake, adding a bit more putty to the rear.Then I added a coating of water effect gel to really make the water look wet. Some of you experienced modelers and mini gamers might recognize a few of the parts I used- there is quite a Frankenstein assortment on her!


This is the original gunboat. Like George Lucas, I felt I could improve it...

.....Unlike George Lucas, I DID improve it!

Some new paint, some little cosmetic changes, and a wet & wild water base!


How about some hull art?


Add caption

On escort duty making sure the party-goers reach the beach!

Makes Normandy Look Like A Playground....

$
0
0
So once again I am watching Episode IV, and once again I am overcome by a particularly potent strain of the creative virus. Once again I am compelled to combine my Battletech universe with the Star Wars universe. I retire to my studio for a vigorous session of hack, glue, & paint. About a week later, here are the fruits of my labor....


HA! A Death Star turbolaser tower.

I made a pair of these bad boys out of blue board, thin cardboard, and some custom sculpted parts. I added a pair of little gemstones to the gun barrels to give them a bit of a glowing effect.

The turrets are fully traversable for the greatest field of fire. This was accomplished by using thick, metal washers. You can see the crew access on this side of the tower.

The armor panels are drawn and cut from thin cardboard.

The rear of the turret shows off the massive exhaust ports.

The gun assemblies are sculpted from Super Sculpey and plastic tubing. Sadly, I did not engineer them to elevate up and down.

The last thing an enemy dropship will see!


Here is an anti-personnel turret from an old Battle Of Hoth diorama kit I got many years ago. The old barrel broke off so I upgraded it!

I also added a targeting sensor.


Not Star Wars, but a pretty good use of spare parts just the same. I really have no clue what the original parts came from.

Again, using tiny gem stones for a glowing laser effect. By the way, they are plastic gems, not real ones. I'm not that crazy!!!


Finally....Some New Mechs To Look At!!!!

$
0
0
I hope nobody missed me too much. I have been so busy with my real job that i haven't had much time to do what i enjoy doing. In fact, I almost had a melt-down because of the unreasonable amount of overtime my job is forcing us to work (actually, the melt-down is still at condition yellow). At the first of the year, I had put in for a few days of vacation over the 4th of July weekend and totally forgot about it! Ahhhh, what a sweet, welcome relief to have 5 days of relative calm. Anyhow, what you've all been wondering is what the hell have I been up to? Allow me to end the hiatus...for the time being.

My lovely assistant keeps the work chair warm.

A fast attack party looking for enemy supply lines to disrupt.

This is a custom N-scale bushwacker sculpted by my friend Orkoone set on a custom base by my friend RacerX, both of whom i met on the Lords Of The Battlefield forum.

 The torso is fully mobile.

I added a small vent to the back of the left arm launcher.

I also added the targeting array to the right torso, extended the gun barrels on the right arm weapons using metal tubing, and added a small power cable to the small gun using a piece of guitar string.

This is a modified MW Raptor alongside a modified Kite hover tank. One of their few original mechs I actually liked. You can see the added heat sink behind the laser on the right torso as well as the minigun tucked under the hull.

Here is the other mod- a laser cannon with a targeting computer.

Added a guitar string power cable to the back of the laser cannon.

A familiar theme here for all of us X-box fans. N-scale Halo vehicles! The Pelican dropship and the Warthog are hand-sculpted by me.

The Scorpion battle tanks are modified MW pieces. I do not remember what they were, I just knew they suited my purpose perfectly with very little work. I hand sculpted the turrets and the driver compartment.

a nice shot of the whole battle group.

Here is a slightly modified Robotech toy, known in Battletech as the Longbow.

I sculpted the missile ports and the pod covers.

To keep things a bit more family friendly, I painted a bra on the mech honey. You can also see where I added some armor plating to the top of the missile pods.

I also sculpted a cockpit, a bit more of a nose, and a pair of chin-mounted cannons.

Finally, I added a couple of vent covers to the round ports in the rear.

A custom sculpted Dragon by Orkoone.

To add a bit more movement to my mini, I altered the hip joints. I also added a thick washer to the torso to give her a bit more height in proportion to the long legs.

I also added a couple of thin washers to the shoulders so the arms would not hit the legs when the torso turned. It also gives her a slightly wider, meaner stance.

I sculpted the base myself. She is flanked by a pair of modified MW Kites and a Micromachine tank that I can only describe as a minigun nightmare!


I wanted to do something interesting with one of my MW Thors. I was inspired by the X-box game Mech Assault. Before you could fire your PPCs, they had to charge up. I have tried to capture that moment with this Thor.

The PPC ball is a wad of sponge with copper wiring stuck in it.

Anbody that played or still plays MW:DA might recognize what I used for the jump jets- the heat dials i pulled off of the base! I also altered the left arm cannon by making a new barrel and sculpting an ammo drum for it.


Another modified Thor with a few of his lance mates.

First, I sculpted a new lower left arm assembly and gave him a hand. The laser cannon pod on the left shoulder is from a Macross pod walker. The right arm cannon is from an old Votoms trooper model.

The camo netting is the backing off a 3M Hook-It sanding disc. I dyed it green and brown using ink and then carefully glued it into place on the mech.


How's that for an update? This should keep you guys busy for a while. What is in the pipeline? I've got a couple of old Ral Partha museum scale Madcats that I am painting for a friend. Hopefully I can get these girls finished before the weekend is over....Until then, I apologize for being gone so long. It is good to be back!

Finally.....Some New Stuff To Show!

$
0
0
Holy crap, it has been a while since I've had any decent amount of free time, but I am back! I won't take up too much time talking here, since you are all anxious to see what I have been up to now. On with the show...Remeber to click the pics for a bigger view.


This is a new 15mm hover tank sculpted after the old FASA Centurion-style grav tanks. I'm not sure if these are in full production yet. I was given this one to help generate some excitement!

I have added a few details to my tank that do not come on the original. The missile launcher is the most obvious. The targeting lens below it is another one of my added details.

The muzzle brakes on both cannons are also my added touch. The smaller targeting lens in front of the commander's hatch is also added.

The thruster nozzles and the round panels were added by me.

Notice the hex nut where the main gun meets the hull? How about the small headlights? Or the sensor dome just behind the hull hatches? Yep, I added those.

I also added the small vents on top of the hull just in front of the circular panels.

Owen, if you are reading this, perhaps you could add a comment on where someone could purchase one of these when they are available? Despite my addition of several small details, the kit was very well cast and looks fantastic even without my modifications.
   Some may ask what is that thing that looks like a land speeder? I turned an old Micromachine speed boat into a Star Wars-style land speeder....something to make Luke green with envy.

In Honor Of My Favorite Video Games.

$
0
0
Another project I fiddled with for some time was a small "defensive" site for launching small, defensive nukes at global or orbital targets. I started with some random bits and chunks of blue board. I crafted my building and then became stuck on what I wanted the launch bay to look like. The project got set aside while I waited for some inspiration....Then at work one day, I found a home-made pen holder and suddenly my solution had presented itself! My single launch site was going to become a multiple launch site!

The launch facility manufactured by the Hyperion Corporation. Here is my first honor to the game Borderlands 1 & 2. The second honor goes to the Halo series in the form of the Warthog vehicle.

A close up of the launch bay in DEFCON 5 position. The panels are made out of cardboard and the other mechanical details are random plastic bits. The warning lights are glass jewels. Unfortunately, I did not have the necessary equipment at this time to light them up. The launch door tracks are made out of zip ties. The alien trees are actually black walnuts that I picked up while disc golfing. I just added some plastic leaves.

Here is the launch bay at DEFCON 1. Now you can see the pen holder and the warheads that I sculpted.

A shot of the AAA turret defending the base.

The turret guns are made from some Armored Core extras. I extended the gun barrels with some stock plastic tubing.

I had to sculpt the turret body to custom-fit the cannons. The automated targeting eye is made out of Kotobukiya customizing parts. The radar assembly is actually the claw off some mech with one of the pincers removed.

The base is a panel from an old Millenium Falcon model.

Just another day at the farm....

Tank Mech Hotness And Lucas Arts Before Disney.

$
0
0
Some of my favorite miniatures come from the Front Mission collectible figures from Japan. They are a perfect fit for my N scale Battletech forces and they have an incredible amount of detail! While there are no official rules for tank mechs in Battletech, that doesn't mean I can't have 'em anyway!


This is a heavily modified tank mech.

I completely reversed the track assembly so the mech body is now in the front. Then I extended the mech body to accommodate the missile launchers. You might recognize the extra hull portion- it is the torso from a Macross armored valkyrie.

The extra launchers are Heavy Gear parts. The targeting array is made from spare bits.

A shot of the cheesecake! Hubba, hubba!

Another modified tank mech. All I really did to her was swap out the arms and add a backpack. The arms came off a MW:DA Daishi, although I added the ammo drums.


Here is a family picture. The mech in the middle is basically un-modified. Yep, those are Terminator HKs in the foreground. They are Micro Machines!

I was just too excited to not show these guys off. 5 TIE-D fighters!!! Yes, 5 of 'em!! These are the ultra-rare Anigrand miniatures. Why are they rare? Lucasarts slapped them with a Cease & Desist copyright infringement case. A few of their kits did make it into the public, though. These guys were included in the Sentinel landing shuttle kit- 1 in each kit. I managed to acquire 3 whole kits plus 2 extras from a friend of mine.
   In the expanded Star Wars universe, the TIE-D is a fighter drone piloted by a droid brain.


Vader and his squadron of TIE-Ds. Vader's TIE-X1 is from the F-Toys model series. Vader came with it, however, I added the lightsaber.

I am still waitng for a bundle of flight bases to arrive in the mail....

....But these were just too cool to keep a secret!

Aerospace Superiority

$
0
0
Some of you may be familiar with my postings on the Battletech forums and already know about the massive amount of air power in my collection. Well, since my blog is fairly new, I will just stick to my newest stuff rather than go back through all the old pictures.
    I have an enormous fetish for assimilating other sci fi genres into my Battletech collection- my Star Wars posts are certainly overwhelming evidence of that! Well, here are a few more fighters from other sources that I have assimilated.....resistance is futile!


If you don't recognize this starfighter, then you are not a true sci fi fan. This is the awesome Gunstar from "The Last Starfighter". A beautiful 1:144 scale resin kit from Fantastic Plastic.


The death blossom covers are fixed open. No way I would fix them closed!

I decided to customize mine a bit by adding some nose art.


Here is a shot just to show the size comparisons.

This is a starfighter from a really old anime series called "Crusher Joe".

I immediately determined there were not enough guns on the stock version, so I went about upgrading the three models I had.

I actually added the rectangular burner nozzles. The stock mini had nothing there but a plain old pair of holes!

Large pulse lasers under the wings and a large autocannon in the nose ought to do the trick!

Fighter #2 has a load out designed for close contact dog fighting.

I sculpted a housing for the gattling gun in the nose and added sets of medium lasers under the wings.

Fighter #3 is set up for low level ground attack. I went with an interesting camo pattern for this one.


I had to sculpt the rocket pods and the pylons for them, but I left the nose mounted weapons in the stock configuration.

Nose art and a few kills!

The business end!

What Does Spiff Use?

$
0
0
I thought this would be a good idea to show you all what I am using to achieve my results. These are not paid advertisements, just simple product endorsements. I'm not telling anybody they have to use these products. I'm just showing you what MY favorites are and if you are just starting out or trying to hone your skills, I hope this might be useful.


I just recently discovered the line of Vallejo paints a couple of years ago. I am absolutely, 100% in love with these paints! A couple of the colors have some consistency issues- yellow and orange, to be exact- but for the most part these are the most painter-friendly acrylics I have ever used.

If Vallejo makes such fantastic paints, then the inks must be good, right? Correct! The inks are very vibrant and I only thin them with water to tone down the coverage. I use the inks primarily as a stain for exhaust vents, tank treads, leg & arm joints, etc. Occasionally I use the inks for my cockpit jeweling effects. The washes, or shades as they are called, are a thinner version of the ink. They immediately flow into the recesses of the surface and hardly affect the surface color. I use these a lot for redefining panel lines and weathering. I use the shades straight outta the bottle- no thinning or strange home combinations are required.

These Secret Weapon washes are very similar to the Vallejo shades, only they come in a wider assortment of colors. They have a slight stain effect, which is useful for when I want something just a few shades off of the base color. Excellent consistency and flow- no thinning required.

I take great pride in the fact that people always ask if that is a decal or did I paint it. Well, this is how I do it. I paint a bit of the medium on the surface where the decal will go. After carefully sliding the decal in place, I use a tiny sponge applicator to press the decal down into the medium and push out the air bubbles. After that dries, I paint on a coat of the matt varnish over the area of the decal. Of course, after the entire mini is done, I give it a shot of Krylon matte spray sealant.

As cheap as these paints are, they are actually good and useful. The white is what I use to lightly highlight all the raised surfaces with. The other colors are good for a rough base coat and painting scenery. They don't cover nearly as well as the Vallejos do, but since they are cheap, it is an acceptable trade-off.

Liquitex ix primarily a canvas-type artist acrylic, but it has some uses on my minis, mostly small detailing uses. These colors are not consistent enough for painting large areas.

FW and Liquitex make some excellent inks, but again, these were not designed with miniature painting in mind. I frequently have to thin them with water to get them to flow a bit better. The red oxide you see in the picture is the ink I use for my rusty effects. The sepia ink I use for tank treads and tires. The other colors I have are used whenever I feel that is the right ink to use....I can't really explain how I know. It is a feeling, like a ripple in the Force.

Well, put them all together and you get a cluttered desktop. A cluttered desk is a sign of genius...right?

Viewing all 36 articles
Browse latest View live